Planning
In our VFX and Post Production module, our task was to create a 60-second video showcasing our visual effects. We were presented with a few examples of mediums to achieve this, such as a TV commercial, a videogame cutscene, a music video or a scene in a tv show or movie. I ended up deciding to do a videogame title cutscene as it is the one I feel most comfortable with, and also it is the one that seemed most appealing to me. The theme I chose to do was a fantasy game, as I felt like I had a better idea of what I might like to include in my sequence.
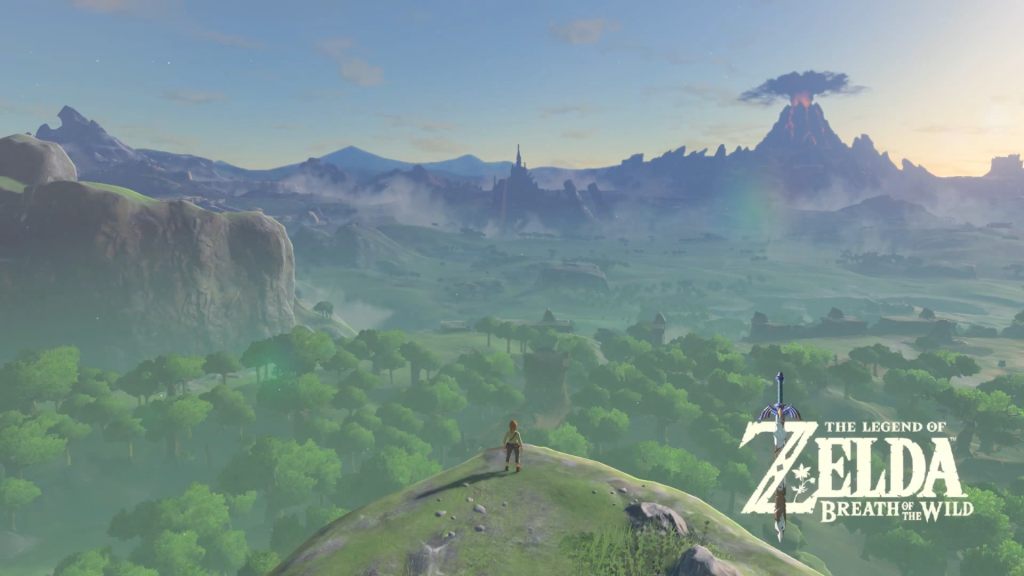
My idea was to create a cave filled with gemstones and to have a campfire outside the cave. I want the cave to serve a more important purpose in the game, so I included a sword inside the cave. Additionally, I decided to include the game’s title at the end alongside the view of the sword in the cave. Quite a few games decide to show off videogame titles and logos in their intros. For example, in ‘The Legend Of Zelda: Breath Of The Wild’ (2017), when the cutscene plays when you first leave the cave, you get a wide vista and the game’s logo appears.
Storyboard
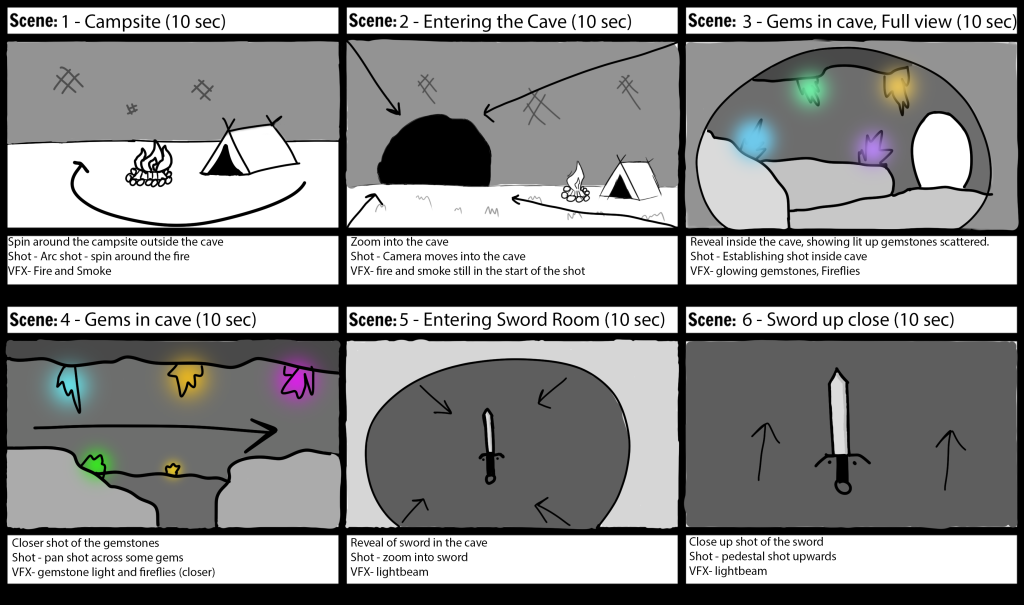
With my idea in mind, I set out to create a storyboard to give me a better idea of how I can start making the sequence. The storyboard helped with the type of camera shots, and how each shot will fit together, and it also helped with what assets I need to find and what VFX I would like to create. In order to create the storyboard I used photoshop and my drawing tablet.
Seen above is what I have drawn out for my storyboard. This is only a basis and an idea of what I will do for my final production, but it has helped me better understand what I need for my sequence. I think that having glowing gemstones will help to contribute to the whole idea of a special cave, and I think it would look nice overall. The planning of the camera movements is also going to come in very handy when creating the animations. I showcased this storyboard to some friends to get feedback and see what I can improve to make the final production piece better. The main feedback was that having 10 seconds per shot can make the whole thing feel odd and not smooth, so to fix that in the final production I made clips varied lengths to make it seem more natural. In addition, I received feedback that having more than just a sword in the other cave room would make it look better. I have decided not to use the gems from the other part of the cave as I think it would distract the view from what I wanted to be the most important part. Instead, I think that I will include a shield alongside the sword and some crates or barrels, showing that this sword was left behind by someone and giving more life to the room. I think torches on either side may also make the room more lively.
Creating The Environment
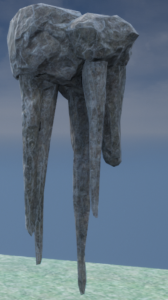
With this feedback in mind and a better understanding of what I wanted to make, I started searching for assets. I found a free cave pack on the unreal marketplace called “soul: cave” in which I use different rocks to form my cave structure in unreal engine 5. I was unable to find gemstone textures, so instead, I took some pointy rocks in the unreal asset pack, and turn them into what I envisioned in the storyboard
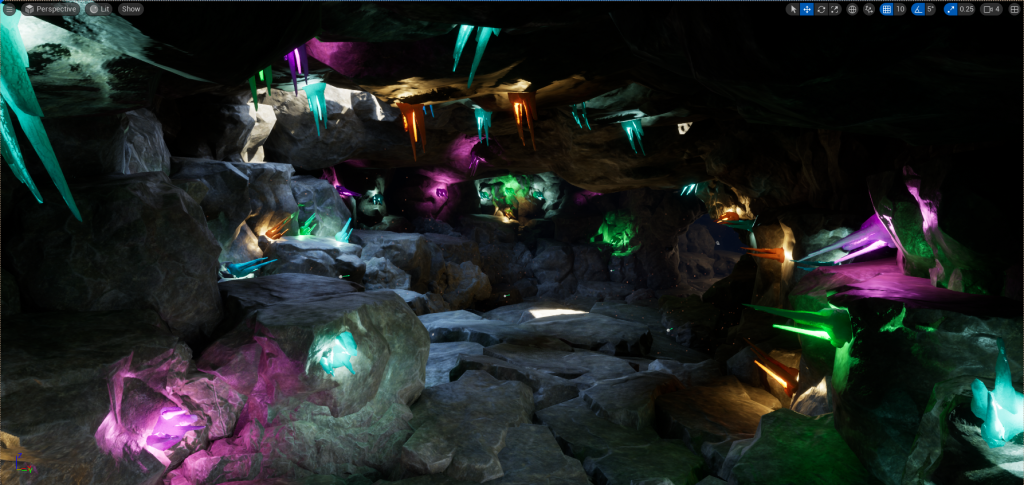
The rock above is what I chose to base my gems on, and I created different materials for my gem colours and included the UV map of the rock to keep that texture on them as the flat base colour gems looked very out of place. Below is the result of what the gemstones look like:
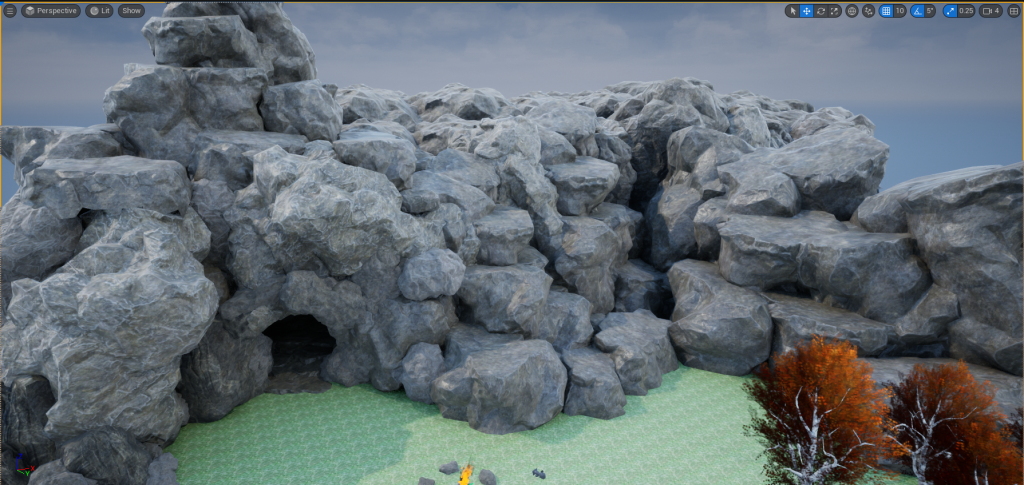
I am quite happy with the way they turned out. I wanted them to glow to give some ambience and light to the cave. To do this I put point lights inside each gem with their corresponding colour. I also turned off the cast shadows setting on them, as the spikes would block the light otherwise causing it to look very unnatural. I then created the whole cave structure by using assets from my cave pack, I moved, resized and fit different rock meshes together until I got the result I wanted.
The cave was planned to have 2 areas – the gem part of the cave, and the area with the sword which is deeper in the cave. Now I had the cave basis formed, I started to place all the gemstones inside. I didnt want to overcrowd the area with them, but at the same time I needed quite alot to give off the effect I wanted, so I went through many iterations of various densities of gems. Feedback from my friends was crucial in this step as it helped me find that perfect balance I was after.
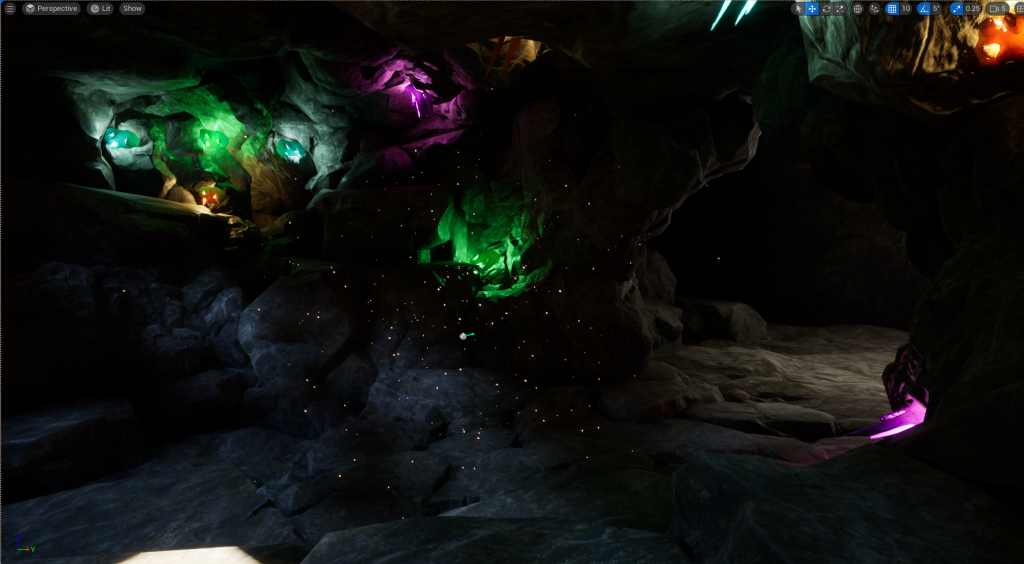
I also wanted to add some particle effects into this area, so what I decided to go with was some fireflies, like what was planned in the storyboard. To create this I used Unreal’s Niagra particle system. When creating the firefly effect there was an option to create a ‘Hanging Particlulates Emmitter’ so I chose that option as it already closely resembled what I was going for. I changed the colour of the particles to a light orange colour to give off that warm firefly effect, and altered the spawn rate and the area they would spawn in. The result was a cluster of fireflies which I dotted around this cave area.
I next took a campfire asset from an unreal asset bundle called “Greenwood Fantasy Village” which I got for free in one of Epic Games’ monthly free asset bundles, and put it outside the cave. The only thing missing was the fire effect, so I had some help from a youtube tutorial by ‘Into The 3D’ called ‘How to Create “FIRE” in Unreal Engine 5’. As with the fireflies, I started with an emitter, in this case it was the fountain emitter as it most closely resembled a fire. I deleted the gravity force from the effect so that it wouldn’t fall because that isn’t realistic. I also altered a few other aspects of the effect, including making the particles larger and slower, and I increased the drag so the particles would be much smoother. When I was happy with the fire, I duplicated it and changed the colour to be a dark grey so it would act like the smoke from the fire. I also changed how long these particles would last, so they would rise above where the fire was, which was perfect for the smoke. This was the result I got when put on the campfire asset:
I didn’t like how it was going straight up so I altered my particle to suit the outside fire by adding a wind force to both the smoke and the fire. This left me with a more detailed result and made it fit with the scene better. I also scaled the particles up to fit the bonfire because it looked unnatural when it was spawning from a small point on the campsite rather than the whole thing. This is the improved result:
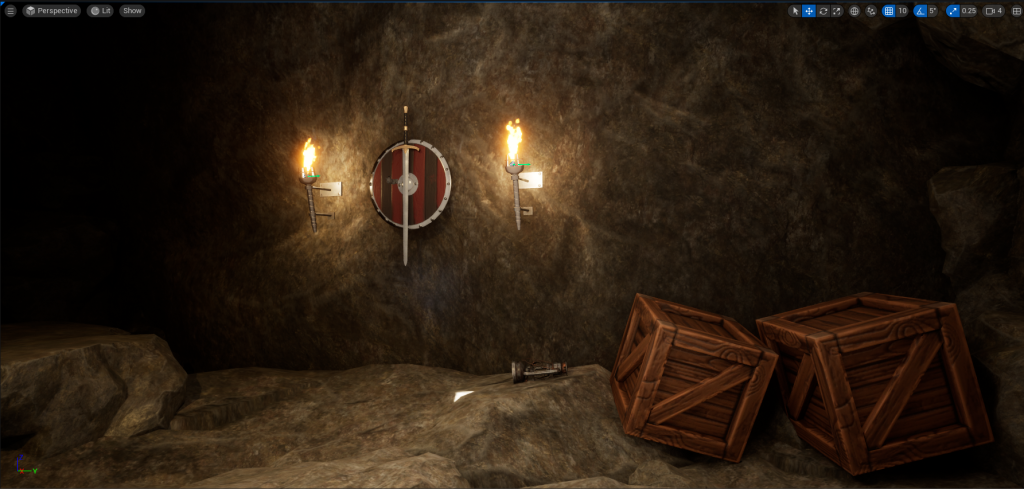
I then got started creating the sword area. I found a weapon asset pack on the Unreal Marketplace called “Free Fantasy Weapon Sample Pack” by ‘Prop Garden LLC’. This pack was perfect and contained a sword and a shield which fit what I was going for very well. I attached the shield onto the wall and the sword on the shield. I thought it looks best this way, and the feedback I got seemed to support that.
However this was all that was in the room at the moment, and I wanted to give the room some character, like I mentioned in the planning and storyboard stage, so I included some crates in the corner, and two torches either side to brighten up the room a bit more.
With all my props set up, it was time to animate my scenes. I created a new sequence and new cameras for every scene I wanted to shoot. This made it so I could render them all separately and edit them in premiere pro however I wanted to later, and gave me more control over the whole process. Using the storyboard as a base, I was able to plot out my shots. Being new to unreal’s sequencer and cameras, I followed a guide by ‘3DTudor’ called “Unreal Engine 5 UE5 How to Learn Camera Animation Level Sequencer Functionality Guide” which helped me greatly in understanding how the cameras and timeline works in unreal. It also came in handy as it showed how to spin a camera around a focus point, which was the exact shot I had in mind for my first sequence. The way to do the arc shot is to attach the camera to an actor where you want it to spin around, then rotate the actor which in turn moves the camera. I did another shot like this for a pan around the gems, but had the camera the other way so it didnt focus on what was being rotated, but instead the walls around the cave.
I quickly found out that the cameras vere very blurry and ruined the shots I wanted to do, so i went into the project settings and turned the blur off to give nice, crisp visuals.
Editing Video
When I had finished doing all my shots, I rendered them in unreal to get video files that I was able to edit in premiere pro. I also went to find some audio for this project. I gathered these using ’‘Zapsplat’ and got audio for nature ambience, cave ambience, and a campfire sound. I wanted the end of the whole piece by fading the audio and video at the same time this is because i felt that it would be more natural than ending it abruptly. There is a built in tool for fading out audio, but I decided against using this as it didnt give me the control I wanted, so instead I found out that I could use keyframes to change the volume of audio tracks, which allowed me to sync it up with the video. The keyframes can also be used on video tracks to alter its opacity, which allows me to fade clips into eachother for smooth transitions.
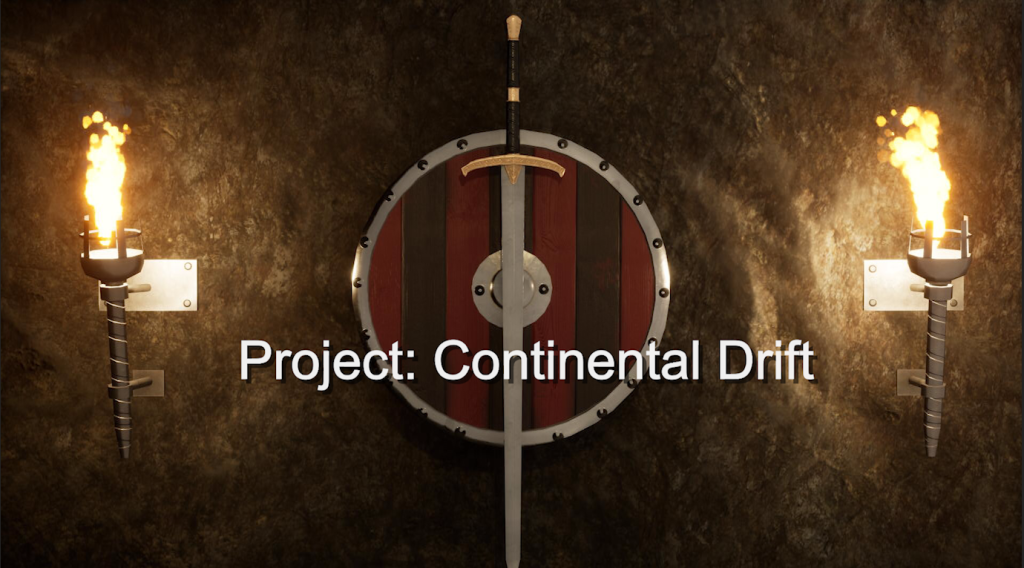
At the end of the scene, I planned to use a title to fade in. The title I ended up choosing was “Project: Continental Drift” because I wanted there to be some connection with the past included in the story. If I were to continue the development of this, it may change later down the line but I was happy with it as a work in progress title. I created the text using Premiere pro’s text features and added a shadow to it too so it would stand out. I then proceeded to fade it in and out using the same method. The end result of the title screen looks like this:
Once I added some fades on other audio and video tracks and linked them in a way I thought was good, I exported the video. This is the final output:
Overall I am quite proud of what I have produced considering this was my first time experimenting with particle systems and animating the cameras. I think if I had extra time and were to continue this project further, I would like to create my own assets for the gems in the cave just to add that extra bit of detail to make it how I originally envisioned it.
References:
3DTudor (2022) Unreal Engine 5 UE5 How to Learn Camera Animation Level Sequencer Functionality Guide Youtube. Avaliable at: https://www.youtube.com/watch?v=6fRc6PXw2Zs (Accessed: 5/01/2023)
Epic games (2018) Soul: Cave, Unreal Assets. Avaliable at: https://www.unrealengine.com/marketplace/en-US/product/soul-cave (Accessed: 3/01/2023)
Into The 3D (2022) How to Create “FIRE” in Unreal Engine 5, Youtube. Avaliable at: https://www.youtube.com/watch?v=UTvzjJ-gr1k (Accessed: 5/01/2023)
Little Robot Sound Factory (n.d.) Cave ambience, ZapSplat. Avaliable at: https://www.zapsplat.com/music/cave-ambience/ (Accessed: 7/01/2023)
NOTLonely (2017) Greenwood Fantasy Village, Unreal Assets. Avaliable at: https://www.unrealengine.com/marketplace/en-US/product/resubmission-for-release-greenwood-fantasy-village(Accessed: 3/01/2023)
Prop Garden LLC (2018) Free Fantasy Weapon Sample Pack, Unreal Assets. Avaliable at: https://www.unrealengine.com/marketplace/en-US/product/e4494c76c3b348aba7ef9b263a6dd496 (Accessed: 3/01/2023)
Sound Spark LLC (n.d.) Ambience, Ambiance, Ambient, Forest, Nature, Florida, Woods, Wild, Grass, Outdoor, Trees, Day, Dusk, Loop, Seamless, Looping, Bird, Chirp, Chirping, Squeak, Squawk, ZapSplat. Avaliable at: https://www.zapsplat.com/music/ambience-ambiance-ambient-forest-nature-florida-woods-wild-grass-outdoor-trees-day-dusk-loop-seamless-looping-bird-chirp-chirping-squeak-squawk/ (Accessed: 7/01/2023)
ZapSplat (n.d.) Campfire, flames, burn and sizzle in wind, ZapSplat. Avaliable at: https://www.zapsplat.com/music/campfire-flames-burn-and-sizzle-in-wind/ (Accessed: 7/01/2023)
